Showing posts with label TUTORIALS. Show all posts

Thursday, October 8, 2020

A Tea Bag Dispenser!

Hello....

Am just happy that I could revive my crafty blog which paves way to journal & share my creative side.... Am a chatter box who does not like to stop unless am down & low.... But tht depends definitely on the person who i talk to.... If it is someone my soul connects with then am so... if not, I keep it limited.... And I feel that is apt according to the current world..... :)

Well.... This post is not about me.... It's about something I recently created.... after lonnnnnnnngggggg... :P

A TEA BAG DISPENSER - I was very skeptical when the thought passed my mind... cuz it has been years since I plunged into serious crafting.... But once I set my foot in, I just waded in & it pleasingly kept me going, inspiring me at every step.....

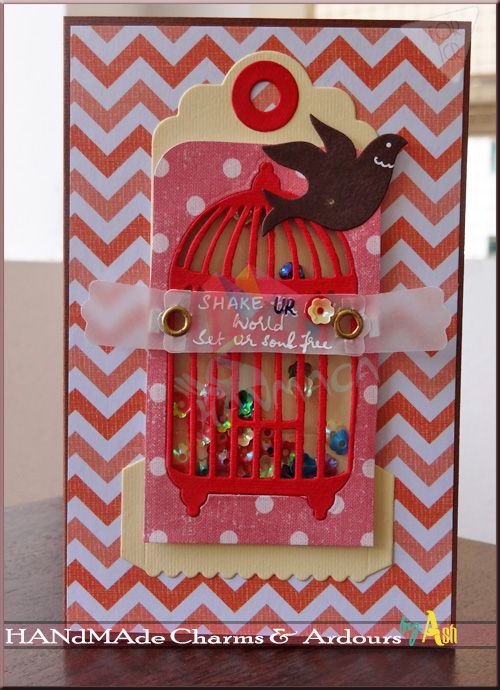
SO here is my project....


Followed the simple instructions by Heidi Baks - RunningwScissorsStamper
Thankful... 🙏
 
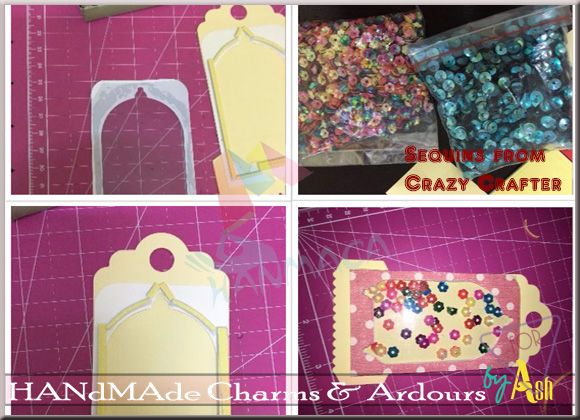
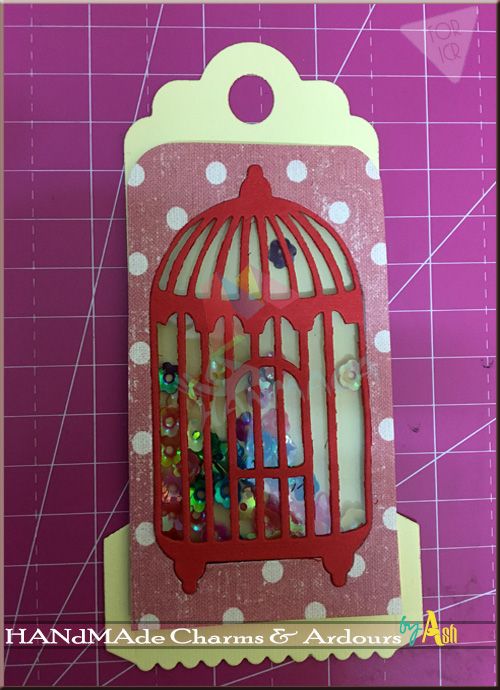
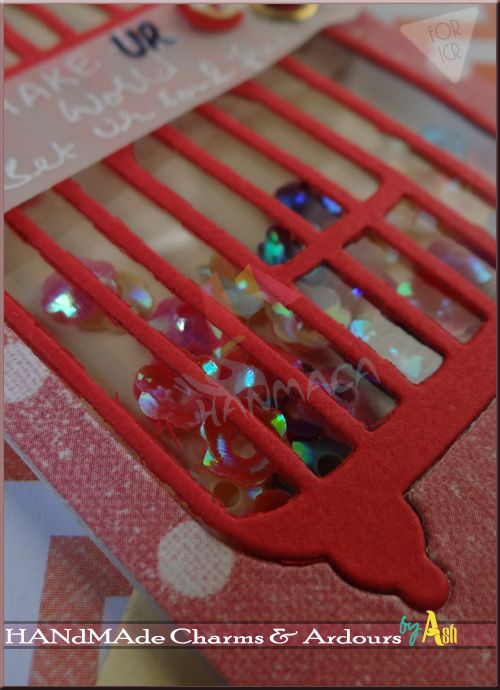
However.... As I waded in the waters, I improvised it a lil to suit my liking...... And below are few clicks to the development of my project....


I loved making that sturdy base for my dispenser.... That pleases me with my project, just the way I had wished it to please me..... 😎

A perfect gift 🎁 for someone you love, this festive season, which is otherwise so monotonous, fearful & unhealthy.... It is an awesome piece to be owned for your healthy dips, by your dining table, niche or just your center/side table...

Hoping to craft more with the days to come.... 

UNTIL NEXT, KEEP THE FAITH!!!


Wednesday, October 4, 2017

AsRa - A NAME PLATE For Self Of Self By Self!

Hello,

After long got into crafting & this time wished to work on something I never tried before.... After much thinking, a hard board that I picked from home & brought along struck my mind & I knew what I wanted to work on......

A NAME PLATE for self of self by self..... With loads of mix media around doing the run, I wanted to give it a try too... I have had tried lil tit bits in the past.... A Gift Tag & a Canvas for swap.... But they were the minimal I tried.... This time a lil bigger yet in a simple subtle tone.....

The thought of working on a Name Plate did scare me 'cuz it wasn't a Card which is my comfort zone nor a petty lil album or the sorts.... It was a Name Plate.... The very term is so big & for an amateur to take a dig is definitely challenging....

It wasn't my normal happy sad days either..... I was sulking & realized I cud not let it pass by just being in it & allowing self to sink; I had to channelize my mind into something else which can help me overcome & make the days shorter for me....

So yes I had to let myself at the least attempt one; I cud fail not meeting my own expectations, but I wud be happy I did something to begin with.....

Here is a video with pictures in motion as a slideshow with few details in corresponding to the same.... Hope the details suffice!


Hope it inspires you to try something big walking in your own small path....

UNTIL NEXT, KEEP THE FAITH!!!


Monday, July 17, 2017

Love Holds A Rainbow!

Hello!

For July ICR has taken a pause with its monthly CoasteRide Challenge...
But nevertheless, it still has its creative inkling for this month by means of Tutorials... (Tut)
There had been a Tutorial posted by Priyanka Mathur at the beginning of the month & here is the second part to the something we have called as
CoasteRide Jul-torials!
 My tutorial for today is A Rainbow Colored Card!
http://indianstampers.ning.com/group/icrchallenges/forum/topics/coasteride-jul-torials-rainbow-colored-card

  Am not very good with colors... As in, My mind & fingers do not sync in well to play with colors.... which makes me fear of me messing up the already existing idea on the canvas... Saying so I still tried a Rainbow Card for my tutorial today... 


The card was inspired by the Sketch from Freshly Made Sketches....  

Preparation:
The card here on the show is based 4" X 6" ... That's the standard size I like to play with regularly.... 
  • Cut Your Card Base the size you are comfortable with & keep it aside...

  • Stamp an image (outlined image only so to add in colors later)of your choice on a piece of Cardstock which would be die cut with the complimenting die, with embossing ink & heat emboss it with white embossing powder... I used the Altenew Persian Motifs!
  • On another cardstock piece which would be used for layering, of a color of your choice; I chose black though the water colors do not show really well on black... I stamped the petals stamp & heat embossed them with white embossing powder...
  • Now playing with the watercolors of your choice fill in the embossed outline image with rainbow colors toned up or down to meet your requirement for the outcome...
  • With the complimenting die, die cut the image out after the colors have dried...
  • The layering cardstock with the embossed images would be water colored with your tone of rainbow colors....
  • Once you are ready with the basic ingredients for your card, its time to put them together to shape up your project... {I preferred to layer it from within which wanted me to cut out a coordinating open on my card base & I then layered the cardstock on the inside of the card facing the card front}
  • Once you close the card base the embossed layer shows up through the die cut space... 
  • You may go ahead & embellish the card as you may choose to... {I wanted a lil more of the rainbow colors on my card; hence opted to dab them out on my card front for which I used the positive of a stitched rectangle set from Cottage Cutz... I placed it on the layered front open face down.}

  • I then went on a color dabbing spree with a not so thick paint brush as I wanted tiny dots of rainbow colors only
  • Once done I removed the masked layer & added another layer for a frame, die cut with the Stitched rectangle Die....
  • I printed out my own sentiment & pinned it up to the die cut motif & glued them down on the card base with few pop dots from Itsy Bitsy...
Now there goes my Rainbow Colored Card for the CoateRide Jul-Torial!
Hope to have you play with us....

UNTIL NEXT, KEEP THE FAITH!!!

Friday, September 2, 2016

CoasteRide Septorial - A Lil More Of Stamps!

Hello Everyone!

We are towards the end of 2016 when we had just awakened to its beginning..... I dont understand what happening with time!

Anyways..... Another month brings in another CoasteRide Challenge on the Indian Craft Room....
However, for the month of September it has been paused... Instead it has been replaced with another thought.... Thought of playing tutorials for all.....

No challenge..... No sponsorship.....

just simply watch.... learn.... create..... share..... And we are calling it The CoasteRide Septorials!!!!


Every week One PART member would be sharing a tutorial based project either through pictures or a video shoot....

So it begins with me Alphabetically..... And I bring my project on a videorial!!!!

And this is what I made.....

 photo HereampNow_zpslvvi3md1.jpg

And beneath is the videorial to the same!!!


{Not a very good video 'cuz of the lack of so many things which I normally have in place to make it seamless as much as i can.... However the shredded me is left with very lil options}

Hence I did not leave it at that.... And made another set of projects on the same lines.....

And beneath I would be sharing a pictorial to the same.... Hope that helps a lil more!

Since its a PICTORIAL.... Kindly bear with me....

  photo ThePrepNew_zps5a3ccce1.jpg

Here is the project for you....

 photo Njoy Lil_zpszo5ii4ye.jpg

Lets begin..... (y)

Here is what you would need....

1. Your favorite Stamp set
2. A CS as a layer on card base
3. Craft Knife
4. Scissor
5. Your favorite inks

{For some reason this pic & the one following this just does not paste itself or pose itself straight as to be easy to the eyes... So kindly ignore the irk in your eyes :( }

 On this project instead of my ink pads I have used my bic marker to ink the stamp to use....


 So now ink the stamp adhered to the acrylic block....

 & stamp stamp the stamp on to the CS layer till your are happy of it "dying" on your CS... ;)

 Ink the stamp again & let it "dye" again on a rough sheet of paper which you would be cutting out to adhere on the image so as to mask it well....

 Now you would use your favorite background stamp for the lovely background on your card project.... As you stamp over the already existing image mask the image beneath is left safely untouched....


 Once you are done with your required background to be pleasing your eyes, peel off the mask.... And TADA..... You have your lovely focal image intact with neat background in its vicinity....
 Now the fun part.....

Take your craft knife & smoothly make neat cuts around the spaces of the background images that you would wanna add an extra dimension to.... which would in turn come across beautifully to the crafting eyes...
 When you make the cuts instead of moving your hand with the knife around the image.... its better you move the paper completely helping your hand & knife to sync well with the work....

 Once you have made your cuts, its time to work on it fine.... so as to flip them open on your project.... Do not let them pop out of your project; instead just nicely & lovingly flip the added layer open.... just a lil so to make a teeny weeny peek a boo....

 There you go.... You just crafted a lil more with your usual inked up stamps.... to give your project totally a different dimension on the whole....

 Once you know of it you may go ahead & try to flip open anything & everything to add a zing to your creation taking it to another level....


Go ahead & layer it on the card base or a post card base & your project is ready with a different approach to it than your usual menu....

Here is yet another project I made similar to the above post card.... Its a regular card!

 photo NjoyLil_zps8bzvkkez.jpg 

 That is it for now..... Hoping you were inspired enough to play your first septorial.....
Keep a watch for more tuts on ICR this month & all coming months.... :D

Meanwhile do check on all the exciting Swaps & Trades ICR promises you with..... Its just about pushing your envelopes....

http://indianstampers.ning.com/group/artist-trading-cards-atc/forum/topics/september-let-s-make-our-miniature-color-palettes
http://indianstampers.ning.com/group/icrbartersociety/forum/topics/september-2016-swap
 BOTH .... ATC & SWAP registrations end by September 7th, midnight!
http://www.indiancraftroom.in/
And accounting the new joinees on our DT, ICR is excited to reveal them in a DT Reveal Chat Party to be held in the ICR Chat Room.... 

UNTIL NEXT, KEEP THE FAITH!!!
 
 photo Signaturenew_zps6434c4a9.jpg

Tuesday, July 5, 2016

Shake & Set ur Soul Free!!!

Hello,

It's July & time for another CoasteRide ICRCMON01.... It's gonna be a Shaker month on ICR with the CoasteRide associating with the monthly swop.... ICRSC for July...


http://indianstampers.ning.com/group/icrchallenges/forum/topics/icrcmon01-shaker-cards-3-pattern-papers

And here is my DT Insight to it.....

Shaker

And was inspired by 

MFT Sketch Challenge....
Color Throwdown Challenge....

 photo ThePrepNew_zps5a3ccce1.jpg

And for the month of July Crazy Crafter - Online Craft Supplies Store generously sponsored beautiful packs of sequins to the ICR DT & all were extremely excited to work with them....

Talking abt me personally I am not a glittery person.... I love things simple & elegant where the entity needs no extra shimmer but can stand out all by itself.... & never used sequins ever on my crafts... But thankfully this time around I had the opportunity to work with these sequins given away by my dear friend Sudha Kalra .... And Whoa I so loved everything about them.... The colors shapes & feel.... It convinced me much tht I cud do much with these cute shimmers.... Thank You Sudha!

And below is how I worked with my project....


  • Used the Gift Tag with pouch Die from Memory Box.... After I cut the image out I did not fold the scores for the pouch... I just left it as it was to just work over it....
  • I then used an Itsy Bitsy Die I had picked up long back.... which was finally used now... I used it on few color CSs & few DPs.... & just kinda tried to match them arnd to bring out the best combination.... 
  • Used the negatives to layer on the gift tag by adhering it over... I then adhered foam tape in thin strands to give the tag the required bulge to hold the sequins & to avoid them sneaking through for a spill out.... 
  •  On the other negative of the cage DIE from Itsy Bitsy over a DP I adhered down a piece of acetate for the peek window...
  • Added a small amount of those beautiful colorful sequins into the layered palette & removed the defensive layer over the foam tape & eye balling well adhered it down with a lil fevicol....
  • Now my shaker tag was ready.... I loved the outcome & the process was all fun to achieve it... 
Shaker 

Isn't that a wonderful looking interactive gift tag? Keep shaking it for as long as u please.... :D

Shaker 

 However did not wanna stop there as I wanted to create few more tags... hence just adhered that tag on to a Chocolate CS from Fabriano.... layered with a piece of chevron designed DP to make my card....

 And completed the entire project with another Die used from the same set of Itsy Bitsy Cage Die's.... ran it over another plain DP & used it as an embellishment with a lil doodling around.... AND a mindmade sentiment of my own.... Making it lye on the cage die cut which was the positive of the cage die ran over a Christmas red CS from Fabriano....

Shaker

Above is a peek of the caged window to the beautiful sequins.... 

Do hop over to ICR to play with our CoasteRide this month on ICRCMON01 & the monthly swop ICRSC for July..... 

And there is the new ATC Swop that has been kick started too.... Happy Crafting & Trading!!! 

UNTIL NEXT, KEEP THE FAITH!!!

 photo Signaturenew_zps6434c4a9.jpg

You might also like:

Related Posts with Thumbnails